There is nothing quite like the roar of a snowmobile engine as you carve through fresh powder in Swan Valley. It’s exhilarating, loud, and incredibly fun. But that engine noise, combined with a full-face helmet and wind rushing past at 40 mph, creates a significant challenge: communication.
You can’t shout instructions to your buddies. You can’t yell a warning about a sudden icy patch or a moose on the trail ahead. If you are riding with more than one person—which you almost always should be for safety—you need a way to talk without speaking.
At Joyride Rentals, we don’t just want you to have fun; we want you to come back safe. Knowing standard hand signals isn’t just trail etiquette; it’s a critical safety skill that prevents collisions and keeps groups together. Here is your crash course in “Trail Talk.”
The Golden Rule: Safety First
Before we get into specific signals, remember the most crucial rule of snowmobile communication: Only signal when it is safe to do so.
On a snowmobile, your right hand operates the throttle and your left hand operates the brake. Because you must always maintain speed control, never take your right hand off the handlebars while moving. Your left hand is used for both braking and signaling.
Pro Tip: If you are in a technical turn or on icy terrain where you need your brake, keep both hands on the bars. Safety and machine control always come before a hand signal. Wait until you are on a stable, straight stretch to communicate.
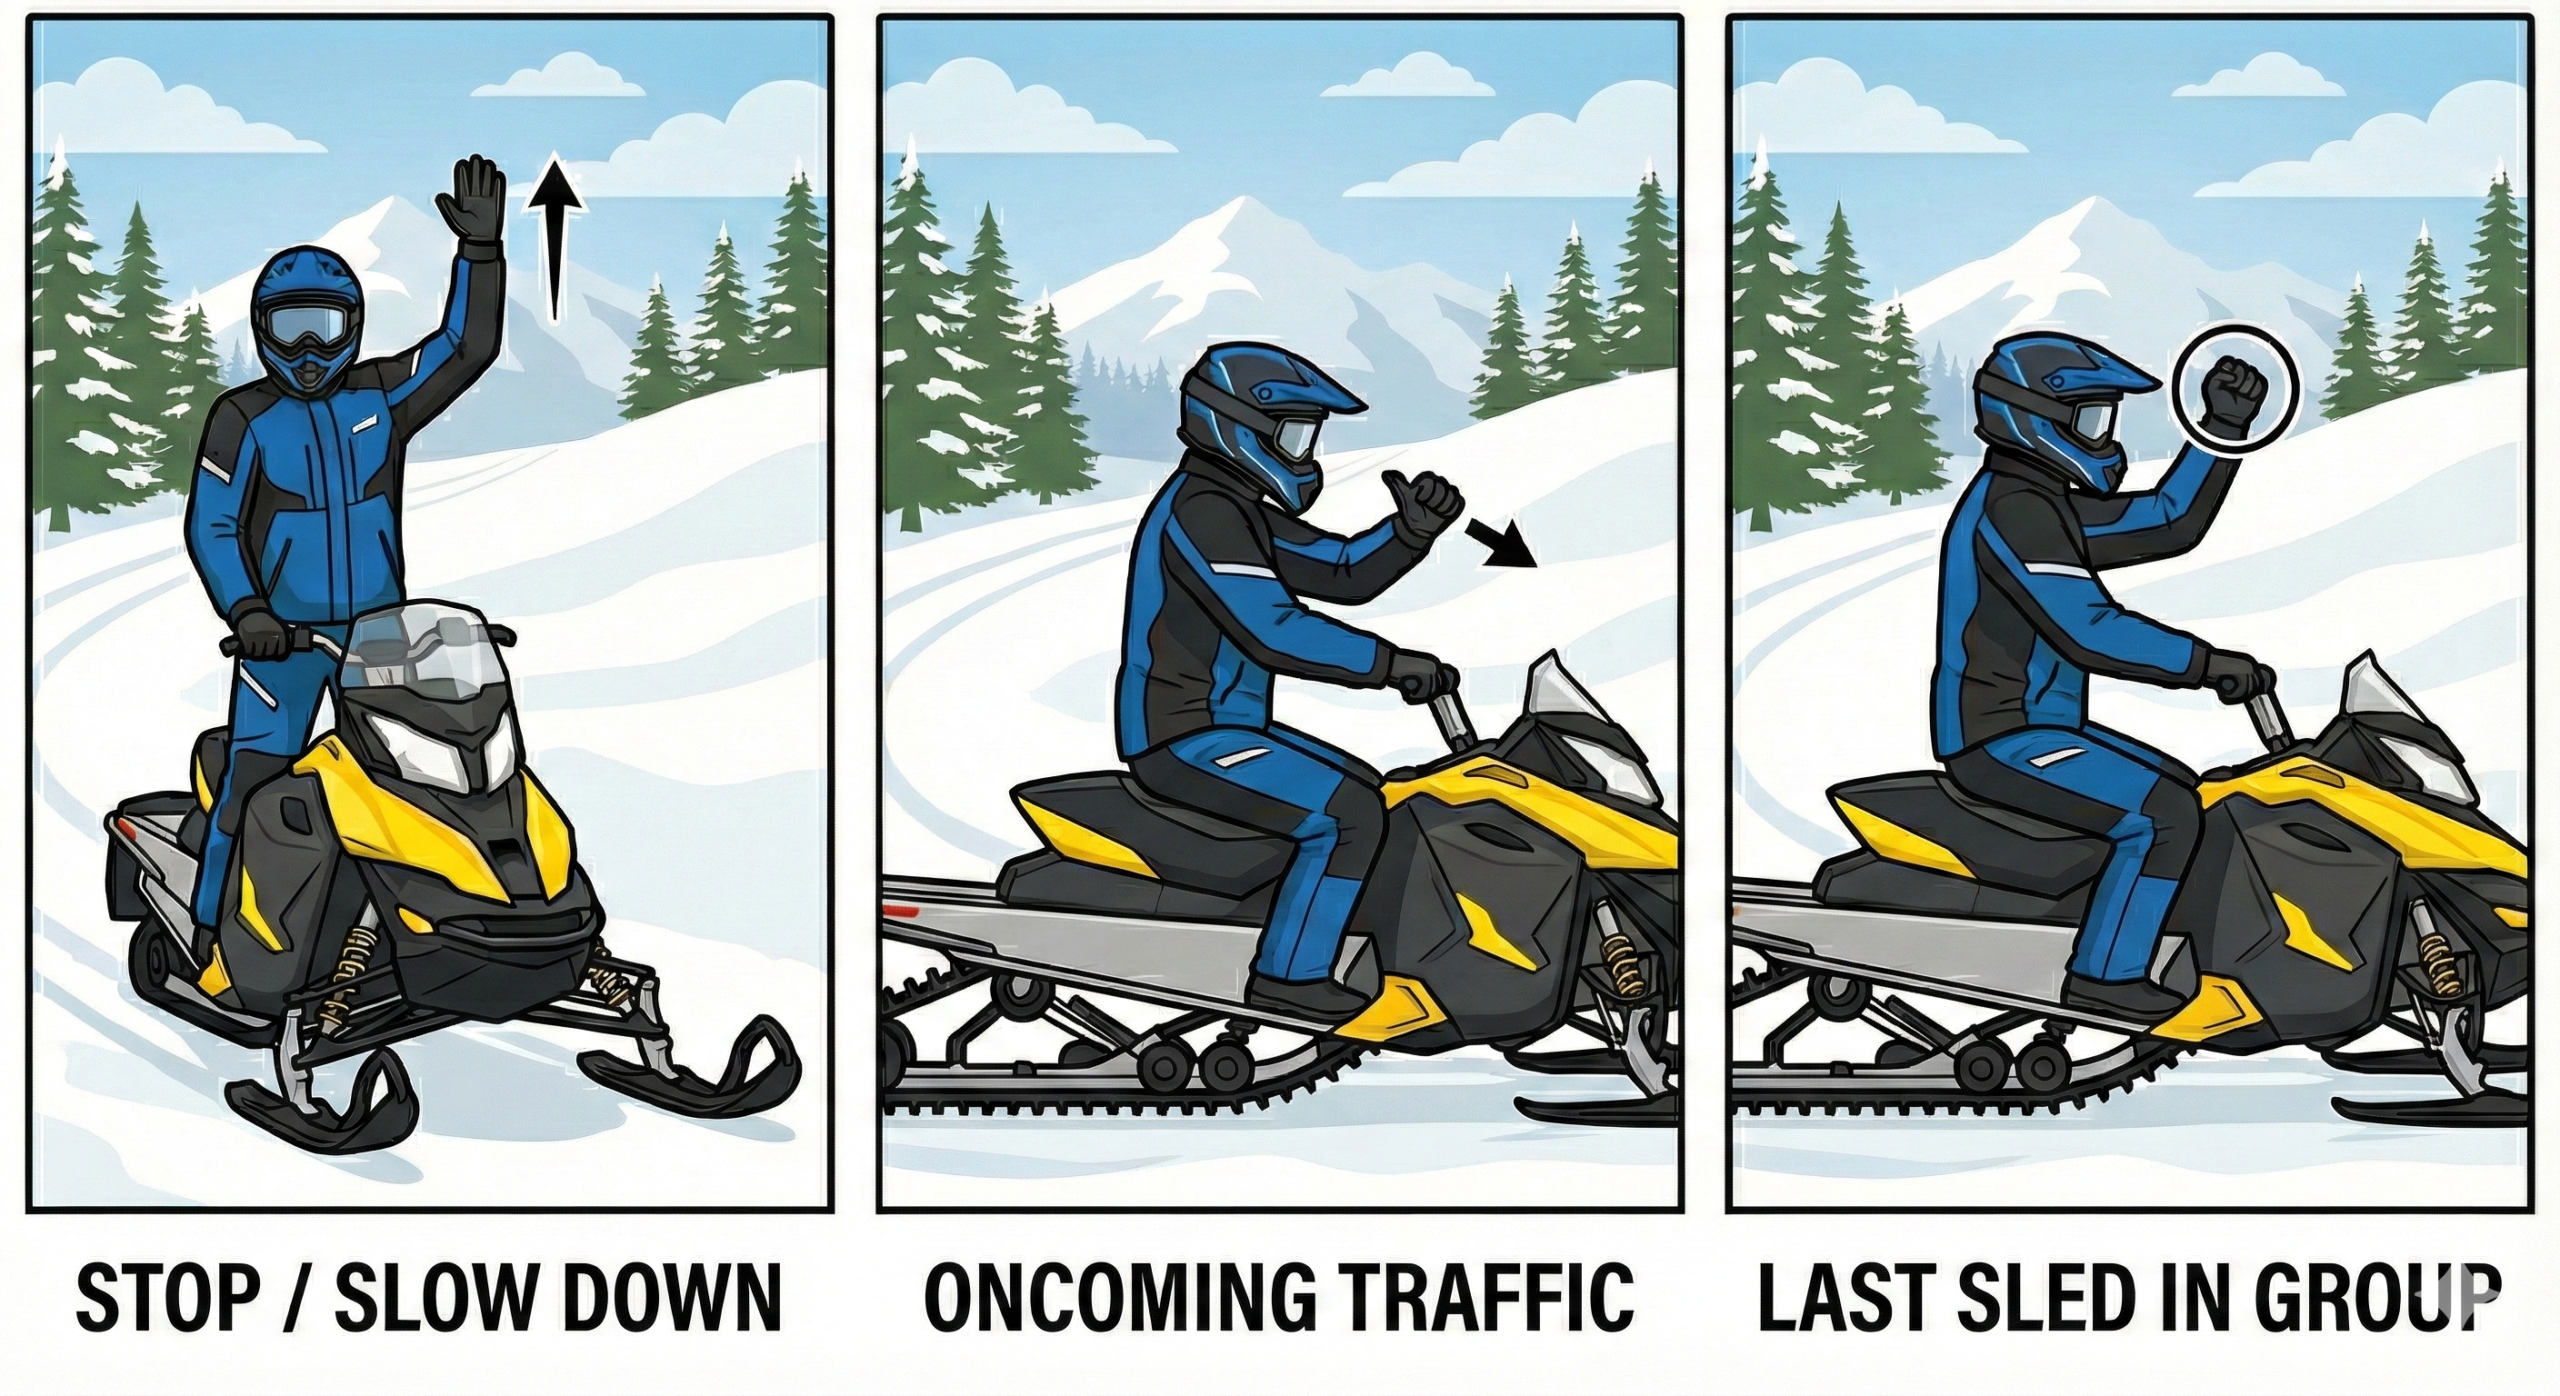
1. The “Stop” or “Slow Down”
This is the most basic and vital signal. You’re leading the pack and see a massive drift across the trail, a fallen branch, or you need a breather.
How to do it: Raise your left arm straight up in the air, open palm, over your head.
Why it matters: Snowmobiles don’t stop on a dime, especially on icy groomed trails. Giving riders behind you advanced warning lets them slow gradually, preventing a rear-end pile-up.
2. Oncoming Traffic (The “Point Back”)
Swan Valley trails are two-way streets. When you encounter another group coming toward you, it is common courtesy—and a significant safety help—to let them know how many people are in your group behind you.
How to do it: As you pass the oncoming lead rider, raise your left arm and use your thumb to point over your left shoulder behind you.
Why it matters: This tells the oncoming rider, “Heads up, I’m not alone. Stay on your side of the trail because more of my crew is coming.” You will often see experienced riders holding up fingers to indicate precisely how many sleds are behind them, but the “thumb point” is the universally understood signal that traffic is following.
3. The “Last Sled” Fist
This signal is the partner to the “Oncoming Traffic” signal, and it’s the responsibility of the very last person in your group.
How to do it: When you are the last rider in line, and you pass oncoming traffic, raise your left arm and hold up a closed fist.
Why it matters: The closed fist means “zero.” It tells the other group, “I am the caboose. The trail behind me is clear.” It gives the oncoming riders peace of mind that they can relax slightly once they pass you, knowing they won’t encounter another sled unexpectedly around the next tight corner.
Communicate Smart
Using “Trail Talk” makes the ride safer and smoother for everyone on the mountain. Just remember: if the terrain gets tough, keep your hands on the grips and your fingers on the brake.
We’ll give you a quick refresher on these signals and your sled’s controls when you arrive for your rental. See you on the trail!